2 min read


3 min read
Here’s a beginner-friendly guide to simple crochet stitches and their symbols that are essential for amigurumi. These stitches are the building blocks for creating your first amigurumi projects. Practice them until you feel comfortable before moving on to more complex patterns!
Purpose: Creates the first loop on your hook to start crocheting.
How to Make It:
Make a loop with the yarn.
Pull the working end through the loop.
Tighten gently around the hook.
Symbol: ○ (often not shown in amigurumi patterns but used to start projects).
Purpose: Forms the foundation for many projects.
How to Make It:
Yarn over (wrap yarn around the hook).
Pull the yarn through the loop on the hook.
Repeat to create a chain.
Symbol: + or ×
Purpose: The most common stitch in amigurumi, used to create tight, dense fabric.
How to Make It:
Insert the hook into the stitch.
Yarn over and pull up a loop (2 loops on the hook).
Yarn over again and pull through both loops.
Symbol: V or ∧
Purpose: Adds stitches to make your work wider.
How to Make It:
Work 2 single crochet stitches into the same stitch.
Symbol: A or Λ
Purpose: Reduces stitches to shape your amigurumi.
How to Make It:
Insert the hook into the next stitch, yarn over, and pull up a loop.
Insert the hook into the following stitch, yarn over, and pull up a loop (3 loops on the hook).
Yarn over and pull through all 3 loops.
Symbol: ○ with a loop (often not shown but described in patterns).
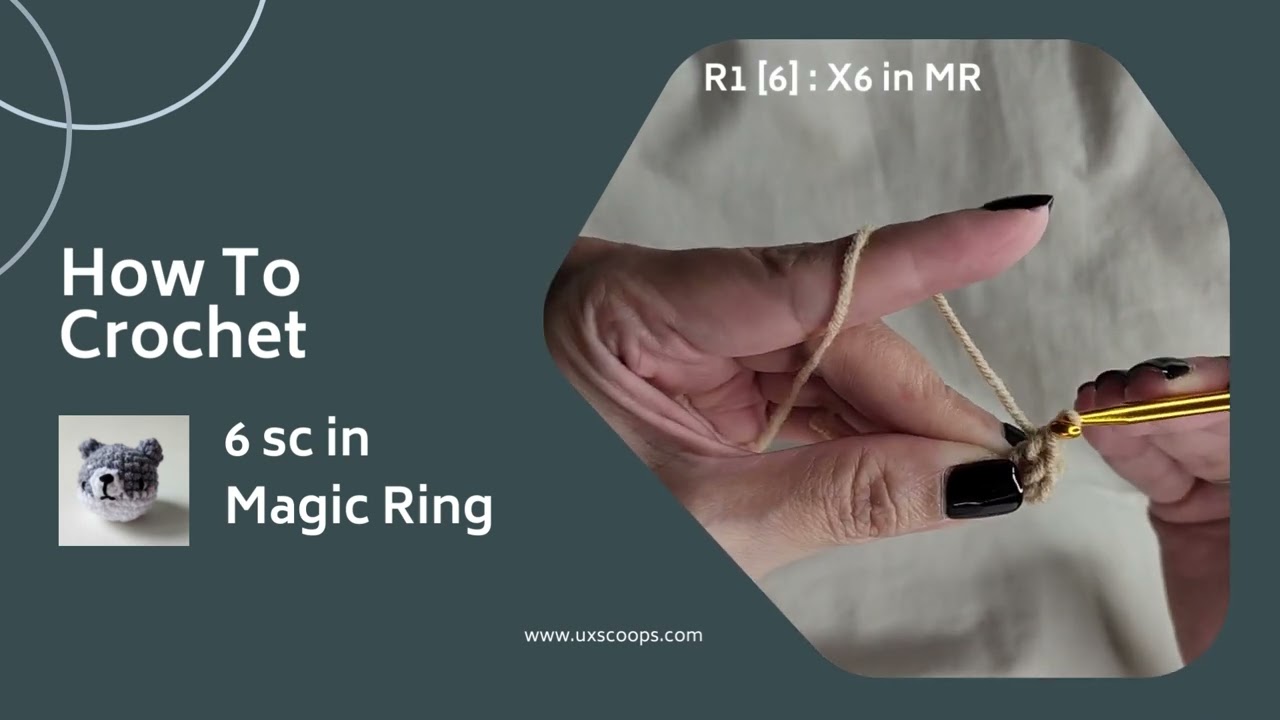
Purpose: Creates a tight, adjustable ring to start working in the round.
How to Make It:
Wrap the yarn around your fingers to form a loop.
Insert the hook under the loop, yarn over, and pull up a loop.
Chain 1 to secure, then work stitches into the ring.
Pull the tail to tighten the ring.
Symbol: • or ●
Purpose: Joins rounds or moves the yarn without adding height.
How to Make It:
Insert the hook into the stitch.
Yarn over and pull through the stitch and the loop on the hook.
Symbol: Not directly shown but used in many stitches.
Purpose: Wraps the yarn around the hook to create loops.
How to Do It:
Wrap the yarn from back to front over the hook.
Start with a small swatch: Practice each stitch in rows to get comfortable.
Work in the round: Once you’re confident, try making a small sphere using single crochet, increases, and decreases.
Use stitch markers: Mark the first stitch of each round to keep track.
Count your stitches: This helps avoid mistakes and ensures even shapes.
Round 1: Make a magic ring, work 6 sc into the ring. (6 stitches)
Round 2: Inc in each stitch around. (12 stitches)
Round 3: 1 sc, 1 inc around. (18 stitches)
Round 4: 1 sc in the next 2 stitches, 1 inc around. (24 stitches)
Round 5: 1 sc in the next 3 stitches, 1 inc around. (30 stitches)
Rounds 6–10: 1 sc in each stitch around. (30 stitches)
Round 11: 1 sc in the next 3 stitches, 1 dec around. (24 stitches)
Round 12: 1 sc in the next 2 stitches, 1 dec around. (18 stitches)
Round 13: 1 sc, 1 dec around. (12 stitches)
Round 14: Dec around. (6 stitches)
Finish: Fasten off, leaving a tail to sew the hole closed.
Here’s a simple color-changing pattern for beginners to practice. This pattern creates a small striped amigurumi ball, which is perfect for learning how to switch colors seamlessly. You’ll need two colors of yarn (Color A and Color B) and a crochet hook.
Yarn: Two colors (Color A and Color B)
Hook: 3.5mm–4mm (or size recommended for your yarn)
Stitch marker
Yarn needle
Scissors
With Color A, make a magic ring.
Work 6 single crochet (sc) into the ring. (6 stitches)
Join with a slip stitch (sl st) to the first sc.
Chain 1 (does not count as a stitch).
Work 2 sc in each stitch around. (12 stitches)
Join with a sl st to the first sc.
Chain 1.
1 sc in the next stitch, 1 increase (inc) around. (18 stitches)
Join with a sl st to the first sc.
Chain 1.
1 sc in the next 2 stitches, 1 inc around. (24 stitches)
Join with a sl st to the first sc.
Chain 1.
1 sc in the next 3 stitches, 1 inc around. (30 stitches)
Join with a sl st to the first sc.
Chain 1.
1 sc in each stitch around. (30 stitches)
Before completing the last stitch, switch to Color B:
Insert the hook into the last stitch, yarn over with Color A, and pull up a loop.
Drop Color A and yarn over with Color B, then pull through both loops on the hook.
Join with a sl st to the first sc using Color B.
Chain 1.
1 sc in each stitch around. (30 stitches)
Join with a sl st to the first sc.
Chain 1.
1 sc in the next 3 stitches, 1 decrease (dec) around. (24 stitches)
Join with a sl st to the first sc.
Chain 1.
1 sc in the next 2 stitches, 1 dec around. (18 stitches)
Join with a sl st to the first sc.
Chain 1.
1 sc, 1 dec around. (12 stitches)
Join with a sl st to the first sc.
Chain 1.
Dec around. (6 stitches)
Join with a sl st to the first sc.
Fasten off, leaving a long tail.
Use the yarn needle to weave in the tail and close the hole.
Switch at the end of the round: Change colors just before completing the last stitch of the round.
Carry the yarn: If you’re switching colors frequently, carry the unused yarn along the inside of the work to avoid cutting and weaving in too many ends.
Weave in ends securely: Use a yarn needle to weave in the tails of the old and new colors to prevent unraveling.
This simple striped ball is a great way to practice color changes while creating a cute amigurumi project. Once you’re comfortable, you can experiment with more complex patterns and color combinations! 🧶✨ FAQ